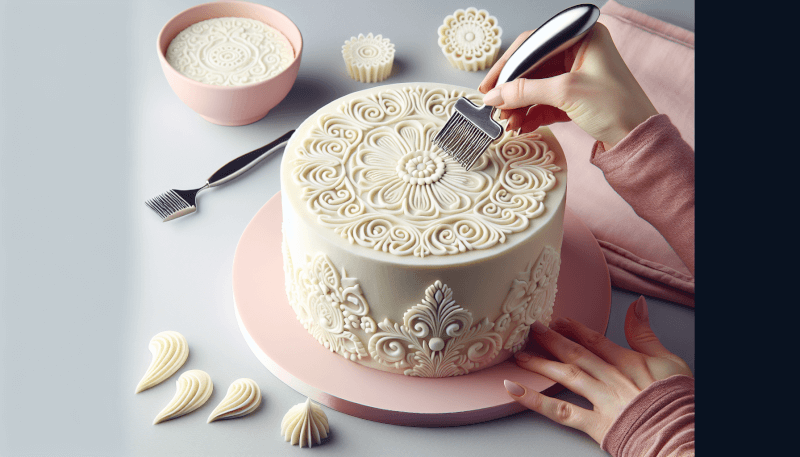
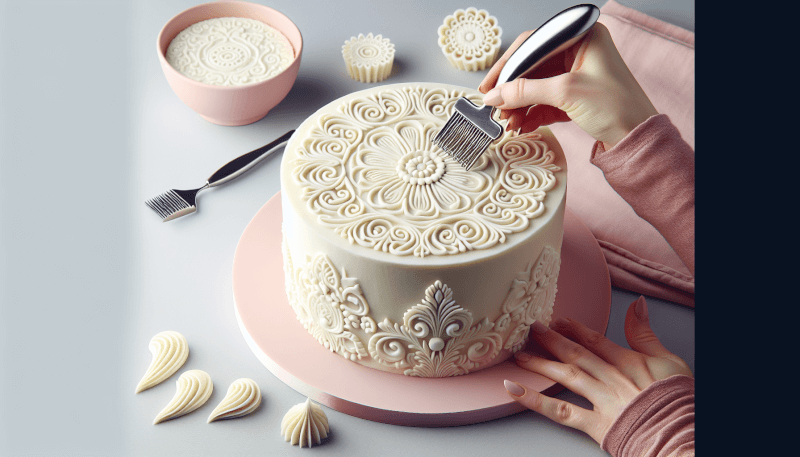
If you’re looking to step up your cake decoration game, a decorating comb might just be your secret weapon. This simple tool can create stunning designs and textures on your cakes, elevating them from ordinary to extraordinary. In this article, we’ll walk you through the steps of properly using a decorating comb for cake decoration, so you can impress your friends and family with your newfound skills. Get ready to unleash your creativity and take your cakes to the next level!
Choosing the Right Decorating Comb
When it comes to cake decoration, choosing the right decorating comb is crucial to achieving the desired textured or smooth patterns. There are several types of decorating combs available, each designed to create different patterns and textures. Some common types include serrated combs, ridged combs, and comb scrapers.
Types of Decorating Combs
- Serrated Combs: These combs have small, sharp teeth that create a zigzag or striped pattern on the cake.
- Ridged Combs: Ridged combs have deeper grooves and are ideal for creating scallops or waves on the cake.
- Comb Scrapers: Comb scrapers feature different patterns and textures on each side, allowing for versatility in cake decoration.
Consider the design you want to achieve and choose a decorating comb that can create that specific pattern.
Considerations for Choosing a Decorating Comb
When selecting a decorating comb, there are a few important factors to consider. Firstly, consider the size of the comb in relation to the size of the cake you are decorating. Smaller combs are more suitable for smaller cakes, while larger combs work best for larger cakes.
Additionally, think about the material of the comb. Stainless steel combs are durable and easy to clean, while plastic combs are lightweight and affordable. Consider your personal preference and budget when deciding on the material.
Lastly, consider the ease of use and grip of the comb. Look for combs with comfortable handles that provide a secure grip, allowing for better control and precision while decorating.
Safety Precautions
Before you begin using a decorating comb, it’s important to prioritize safety. Ensure that the comb is clean and free from any sharp edges or defects that could potentially harm you or damage the cake.
Always handle the decorating comb with caution, keeping your fingers away from the teeth or edges. Take your time and work slowly to avoid any accidents or mishaps.
Preparing the Cake for Decoration
Before you start using the decorating comb, it’s essential to properly prepare the cake for decoration. This includes selecting the right cake, leveling and frosting it, and chilling it to ensure stability during the decoration process.
Choosing the Right Cake
When choosing a cake for decoration, it’s important to consider the flavor, texture, and density. Opt for a cake that is firm enough to hold its shape during the decoration process. Popular choices include butter cakes, sponge cakes, or pound cakes.
Additionally, consider the size and shape of the cake. Ensure it is the appropriate size for the occasion and will fit the design you have in mind.
Leveling and Frosting the Cake
To create a smooth and even base for the decoration, it is important to level and frost the cake properly. Use a cake leveler or a serrated knife to remove any domed or uneven tops from the cake layers. This will ensure a stable and even surface for the decoration.
Next, apply a thin layer of frosting, also known as a crumb coat, to the cake. This helps to trap any loose crumbs and create a smooth foundation for the final layer of frosting.
After the crumb coat has set, apply the final layer of frosting using an offset spatula or a frosting smoother. Ensure the cake is completely covered and the surface is level and smooth.
Chilling the Cake
Before you start using the decorating comb, it’s important to chill the cake. This will help the frosting to set and stabilize, making it easier to achieve clean and sharp patterns with the comb.
Place the cake in the refrigerator for about 30 minutes to an hour, or until the frosting is firm to the touch. Avoid freezing the cake, as it can lead to excessive moisture and affect the final outcome of the decoration.
Using the Decorating Comb
Now that your cake is properly prepared, it’s time to use the decorating comb to create beautiful textured patterns.
Selecting the Design
Before you start using the comb, envision the design you want to create on your cake. Consider the theme of the occasion or the desired aesthetic. If you’re unsure, browse through cake decorating books or websites for inspiration.
Once you have a design in mind, visualize how the comb will be positioned to achieve the desired pattern. This will help you determine the best comb to use and the technique to employ.
Positioning the Comb
To achieve a clean and consistent pattern, it is crucial to position the decorating comb properly. Hold the comb at a 45-degree angle against the side of the cake, ensuring that the teeth or edges are in contact with the frosting.
Start at the bottom of the cake and work your way up, gently dragging the comb along the side of the cake. Maintain a steady pressure and a consistent speed to ensure uniformity in the pattern.
Holding the Comb Properly
To ensure better control and precision, it’s important to hold the decorating comb properly. Grip the handle firmly but not too tightly, and position your fingers away from the teeth or edges.
It may be helpful to practice your grip before starting the actual decoration process. Experiment with different hand positions and find the one that feels most comfortable and allows for better control.
Timing and Pressure
When using the decorating comb, timing and pressure are crucial to achieving the desired texture. Work quickly, but not so fast that you rush through the process. Take your time and maintain a steady hand to create even and well-defined patterns.
In terms of pressure, it’s important to find the right balance. Apply enough pressure to leave an impression on the frosting, but not so much that you damage the cake or remove too much frosting.
Creating Textured Patterns
Decorating combs are perfect for creating a wide range of textured patterns on cakes. Whether you want simple stripes, elegant scallops, or intricate basket weave designs, the decorating comb can help you achieve your desired look.
Stripes
Creating stripes on a cake is simple with a decorating comb. Position the comb vertically against the side of the cake, with the teeth or ridges in contact with the frosting. Gently drag the comb from the bottom to the top of the cake, maintaining a steady hand and consistent pressure. Repeat this process to create evenly spaced vertical stripes.
Scallops
To create scallops on a cake, use a decorating comb with deeper grooves. Hold the comb at a 45-degree angle against the side of the cake and gently drag it along, creating a wave-like pattern. Repeat this process at regular intervals around the cake to create a beautiful scalloped design.
Basket Weave
Basket weave patterns add a touch of elegance to any cake. Using a comb with both serrated and smooth edges, create vertical lines on the cake by dragging the comb along the side. Then, using the smooth edge, create horizontal lines, weaving them over and under the vertical lines to create a basket weave effect.
Zigzag
To create a zigzag pattern, position the comb at a 45-degree angle against the side of the cake. Gently drag the comb up and down in a zigzag motion, maintaining a steady hand and consistent pressure. Repeat this process at regular intervals to create a visually appealing zigzag design.
Combining Patterns
Don’t be afraid to get creative and combine different patterns to create a unique design. Experiment with mixing stripes and scallops, or basket weave and zigzag patterns. Allow your creativity to flow and create a cake that is uniquely yours.
Mastering Smooth Patterns
While textured patterns are popular, achieving a smooth finish on a cake is equally important. With the right techniques, you can create a flawlessly smooth surface using a decorating comb.
Buttercream Smoothing
To achieve a smooth buttercream finish using a decorating comb, start by frosting the cake with a thin layer of buttercream. Then, using a bench scraper or a straight-edged decorating comb, hold it against the side of the cake at a slight angle. Gently drag the comb along the side in a smooth motion, removing excess buttercream and creating a smooth finish.
Fondant Smoothing
If you prefer to work with fondant, achieving a smooth finish is possible with a decorating comb. After covering the cake with fondant, use a smoother to gently glide over the surface, eliminating any air bubbles or wrinkles. Then, using a decorating comb, position it against the side of the cake and gently drag it along to create a subtle texture. This will add visual interest while maintaining a smooth appearance.
Achieving Even Thickness
Whether working with buttercream or fondant, ensuring even thickness is crucial for a professional-looking cake. Start by applying a consistent layer of frosting or fondant, making sure it’s evenly spread across the cake surface. Use a spatula or a rolling pin to smooth out any uneven areas, taking care to maintain an even thickness throughout.
Avoiding Gaps and Overlaps
When using a decorating comb to achieve a smooth pattern, it’s important to avoid gaps and overlaps. Ensure that the comb covers the entire cake surface and that each stroke slightly overlaps the previous one. This will create a seamless and uniform pattern, eliminating any unsightly gaps or inconsistencies.
Embellishing with Buttercream
Buttercream is a versatile medium for cake decoration. With the right techniques, you can create beautiful embellishments using a decorating comb.
Creating Rosettes
To create buttercream rosettes, start by attaching a large star-shaped piping tip to a piping bag filled with buttercream. Hold the piping bag at a 90-degree angle above the cake and gently squeeze, allowing the buttercream to form a rosette shape. Continue piping rosettes around the cake, spacing them evenly.
Making Ruffles
Ruffles add an elegant touch to any cake. Fill a piping bag fitted with a petal-shaped piping tip with buttercream. Hold the piping bag at a 45-degree angle against the side of the cake and gently squeeze, allowing the buttercream to form a ruffle shape. Continue piping ruffles around the cake, overlapping them slightly for a layered effect.
Piping Borders
Piping borders can enhance the overall appearance of a cake. Attach a small round piping tip to a piping bag filled with buttercream. Hold the piping bag at a 45-degree angle above the cake and gently squeeze, creating a continuous line of buttercream along the edge of the cake. Experiment with different piping tips and techniques to create unique border designs.
Writing With Buttercream
Writing messages or names on a cake can be done using a decorating comb. Fill a piping bag fitted with a small round piping tip with buttercream. Hold the piping bag at a 90-degree angle above the cake and gently squeeze, moving the piping bag to form letters or words. Practice your lettering beforehand on a separate surface to ensure neat and legible writing.
Embellishing with Fondant
Fondant allows for endless possibilities when it comes to embellishing cakes. With a decorating comb, you can create intricate designs using fondant.
Using Cut-Out Fondant Shapes
Cut-out fondant shapes can be used to decorate a cake. Roll out the fondant to the desired thickness and use cookie cutters or fondant cutters to create various shapes. Carefully place the fondant shapes onto the cake, arranging them in a visually pleasing pattern. Use a decorating comb to add texture or details to the fondant shapes.
Applying Fondant Ribbons
Fondant ribbons are a simple yet effective way to enhance the aesthetics of a cake. Roll out the fondant into a thin sheet and use a sharp knife or a fondant cutter to create long, thin ribbons. Carefully wrap the ribbons around the sides of the cake, ensuring they are evenly spaced. Use a decorating comb to add texture or patterns to the fondant ribbons.
Making Fondant Bows
Fondant bows can be used as a focal point or as a decorative element on a cake. Roll out the fondant and cut out four rectangular pieces of equal size. Fold each rectangle in half and pinch the center to create loops. Arrange the loops to form a bow shape and secure them with a small amount of water or edible glue. Use a decorating comb to add texture or patterns to the fondant bow.
Adding Fondant Flowers
Fondant flowers can add a beautiful touch to a cake. Roll out the fondant and use flower-shaped fondant cutters to create various floral shapes. Apply a small amount of water or edible glue to the back of each fondant flower and carefully place them on the cake. Use a decorating comb to add texture or details to the fondant flowers.
Fixing Mistakes
Even the most experienced cake decorators make mistakes from time to time. Here are some tips for fixing common mistakes while using a decorating comb.
Removing Excess Frosting
If you accidentally apply too much frosting with the decorating comb, gently scrape off the excess using a spatula or a knife. Start at the top of the cake and work your way down, removing any excess frosting without damaging the pattern. Take your time and be gentle to ensure a smooth and clean result.
Correcting Uneven Patterns
If you notice that the pattern created by the decorating comb is uneven or inconsistent, there are ways to fix it. Use a spatula or a small offset spatula to gently smooth out the design, working in a circular motion. This will help blend the pattern and create a more even appearance.
Covering Up Imperfections
In case of any imperfections or mistakes that cannot be easily fixed, there are ways to cover them up. Decorative elements such as fondant flowers, bows, or ribbons can be strategically placed to conceal any flaws. Additionally, piped buttercream or fondant details can be added to distract the eye from imperfections.
Cleaning and Storing the Decorating Comb
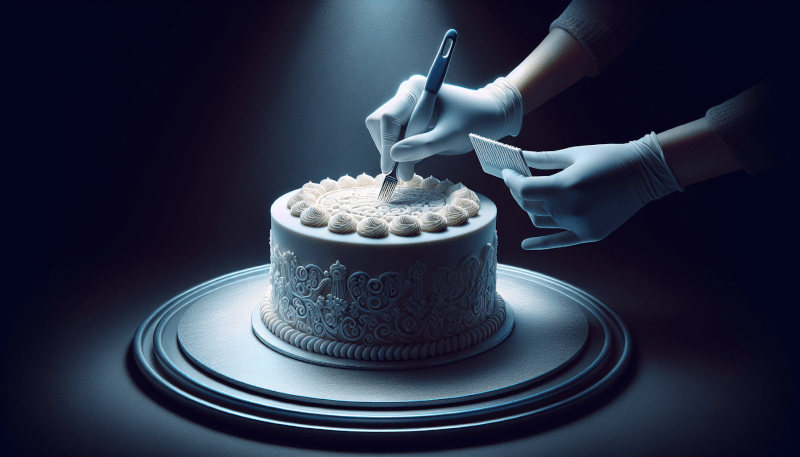
After using the decorating comb, it’s important to clean and store it properly to ensure longevity and hygienic use.
Removing Excess Icing
Before cleaning the decorating comb, remove any excess icing by gently scraping it off with a spatula or a knife. Take care not to damage the teeth or edges of the comb while doing so.
Washing the Comb
To wash the decorating comb, use warm, soapy water and a soft brush or sponge. Gently scrub the comb to remove any remaining icing or debris. Rinse it thoroughly with warm water to ensure all soap residue is removed.
Drying and Storing the Comb
After washing, pat the decorating comb dry with a clean towel or paper towel. Ensure that all moisture is removed from the comb to prevent rust or damage. Once dry, store the comb in a cool, dry place, away from direct sunlight or heat sources. This will help to maintain the quality and durability of the comb for future use.
Practice and Experiment
To become proficient in using a decorating comb and to develop your personal style, it’s important to practice and experiment with different techniques.
Starting with Simple Designs
Begin by practicing simple designs such as vertical stripes or scallops. This will help you familiarize yourself with the process and gain confidence in handling the decorating comb. As you become more comfortable, gradually move on to more complex designs and patterns.
Trying Advanced Techniques
Once you have mastered the basics, it’s time to explore advanced techniques. Experiment with combining different patterns, using multiple combs, or incorporating other cake decorating tools to create unique and intricate designs. Don’t be afraid to push your boundaries and try new things.
Developing Your Personal Style
As you gain experience and confidence, you will naturally develop your own personal style in cake decoration. Embrace your creativity and let it shine through in your designs. Whether it’s through the choice of colors, patterns, or embellishments, your personal style will set your cakes apart and make them truly unique.
In conclusion, using a decorating comb for cake decoration opens up a world of possibilities. With the right comb, proper techniques, and a little practice, you can create stunning textured or smooth patterns on your cakes. Don’t be afraid to experiment, try new designs, and develop your own personal style. So grab your decorating comb and let your creativity soar as you bring beautiful and delicious cakes to life. Happy decorating!
