Are you an avid home baker looking to up your bread-making game? If so, then you’ll want to know all about the ins and outs of using different types of bread proofing baskets. These simple yet essential tools play a crucial role in achieving that perfect loaf. From traditional round baskets to modern banneton and brotform options, each type offers its own unique benefits. Whether you’re a beginner or a seasoned baker, understanding the characteristics and techniques associated with these baskets will undoubtedly enhance your bread-making experience. So, let’s dive into the world of bread proofing baskets and discover the secrets to creating beautifully risen, artisanal loaves of bread.

Choosing the Right Bread Proofing Basket
When it comes to baking bread, one crucial step that often gets overlooked is the proofing process. Proper proofing allows your dough to rise and develop flavor, creating that perfect fluffy texture we all love. And while you may not realize it, the type of bread proofing basket you choose can greatly impact the outcome of your bread. So, let’s dive into the world of bread proofing baskets and explore the different factors to consider when choosing the right one for you.
Material
First things first, let’s talk about the material of the bread proofing basket. The most common materials you’ll come across are natural wicker, plastic, and fabric-lined baskets. Each material has its advantages and disadvantages, so it’s essential to choose the one that suits your baking style and preferences.
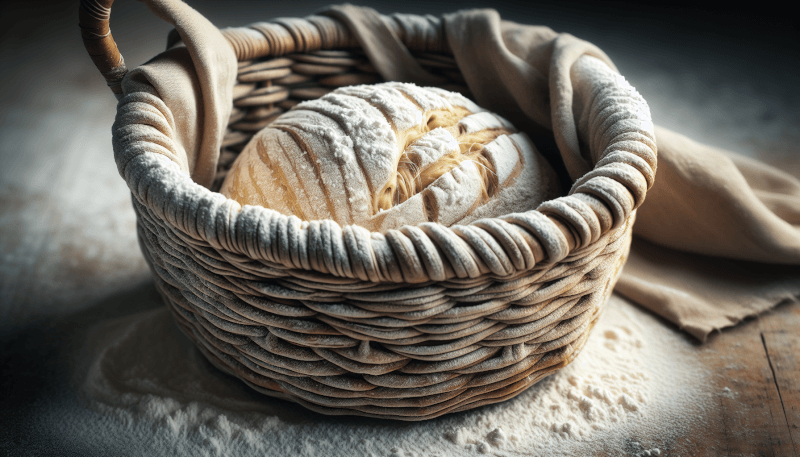
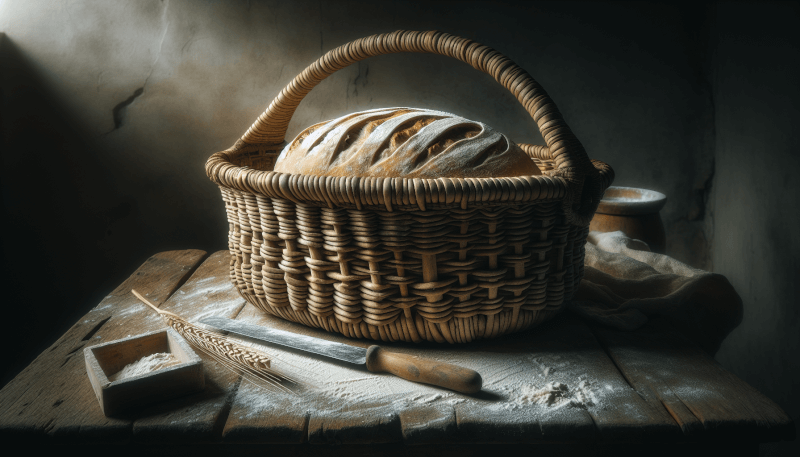
Natural wicker baskets are popular among traditional bakers. They are usually made from rattan or cane, offering a rustic and organic feel to your proofing process. These baskets allow for proper airflow, ensuring your dough gets an even rise. However, they require some extra care and can be a bit challenging to clean compared to other materials.
Plastic proofing baskets, on the other hand, are a more modern and convenient option. They are made from food-grade plastic, which is both durable and easy to clean. These baskets are lightweight, and the dough is less likely to stick to their smooth surfaces. Plastic baskets also come in various shapes and sizes, providing you with more options to choose from.
Fabric-lined bread proofing baskets offer the best of both worlds. They combine the benefits of wicker baskets with the convenience of plastic. The fabric lining enhances air circulation, while also making it easier to release the dough. These baskets are also versatile and come in different shapes and sizes to suit your baking needs.
Size
The size of your bread proofing basket is another critical factor to consider. The right size will allow your dough to rise properly and prevent it from spreading too much during proofing. Generally, you should choose a basket that can comfortably hold the amount of dough you are making. It’s better to go for a slightly larger basket than a smaller one to ensure your dough has enough space to expand.
Shape
The shape of your bread proofing basket can also play a significant role in the final outcome of your bread. The most common bread shapes are round and oval, and luckily, you can find baskets in both of these shapes. Round baskets are perfect for boules or round loaves, while oval baskets work well for batards or oblong shaped loaves. Consider the type of bread you bake most frequently and choose a basket accordingly.
Style
While style may not affect the functionality of your bread proofing basket, it’s always nice to have a basket that matches your kitchen aesthetic. There are various styles to choose from, ranging from traditional and rustic to modern and sleek. Ultimately, the style is a personal preference and won’t impact the bread-making process. So, feel free to choose a basket that complements your kitchen décor and brings you joy every time you bake.
Using Traditional Banneton Baskets
If you’re a fan of the traditional bread-making experience, then a banneton basket is your perfect companion. Banneton baskets, also known as proofing baskets, are made of natural wicker and have been used for centuries by bakers around the world. These baskets offer an authentic touch to your bread-making process and help create that beautiful artisan-style crust.
Preparing the Basket
Before using your banneton basket, it’s crucial to properly prepare it to prevent your dough from sticking. Start by dusting the inside of the basket with flour, making sure to reach all the corners and crevices. This thin layer of flour creates a barrier between the dough and the basket, allowing for easy release once it’s time to bake.
Shaping the Dough
Once your banneton basket is prepared, it’s time to shape your dough. Gently shape the dough into a round or oval shape, depending on the shape of your basket. Place the shaped dough into the floured basket, seam side up. This position will help create that beautiful pattern on the bread’s surface after it rises.
Proofing Time
The proofing time can vary depending on various factors, such as room temperature and the type of bread you’re making. Generally, you should let your dough proof until it has doubled in size. This process can take anywhere from a few hours to overnight, depending on your recipe and desired flavor development. Keep an eye on your dough and use the poke test to determine if it’s ready for baking.
Care and Cleaning
After you’ve baked your bread, it’s essential to take proper care of your banneton basket to ensure its longevity. Remove any excess flour from the basket by gently tapping it outside. You can also use a soft-bristle brush to remove any stubborn residue. Avoid using water or soap, as this can damage the wicker and cause it to deteriorate. Instead, allow your basket to air dry thoroughly before storing it in a dry and well-ventilated area.

Exploring the Benefits of Fabric-lined Baskets
Fabric-lined bread proofing baskets combine the best features of wicker baskets with the advantages of a fabric lining. These baskets offer several benefits that can enhance your bread-making experience.
Enhanced Air Circulation
One of the main advantages of fabric-lined baskets is the enhanced air circulation they provide. The fabric lining allows for better airflow around the dough, promoting even fermentation and preventing any moisture build-up. This improved air circulation can result in a more consistent rise and better flavor development in your bread.
Easy Dough Release
Fabric-lined baskets make it easier to release the dough once it’s fully proofed. The fabric prevents the dough from sticking to the basket, ensuring a smooth and effortless release. This can be especially beneficial for recipes with high hydration dough that tends to be more sticky. With a fabric-lined basket, you won’t have to worry about the dough losing its shape or sticking to the basket during the release process.
Versatile Design
Fabric-lined bread proofing baskets come in various shapes and sizes, giving you more options to choose from based on your baking needs. Whether you prefer round, oval, or even square loaves, you can find a fabric-lined basket that fits your preferred bread shape perfectly. This versatility allows you to experiment with different bread recipes and create beautiful artisan-style loaves.
Maintenance Tips
To ensure the longevity of your fabric-lined basket, it’s essential to follow proper maintenance practices. After each use, gently remove excess flour from the fabric lining using a soft brush or by shaking it out. If there are any sticky residues on the fabric, you can rinse it with warm water and a mild detergent. Allow the fabric to air dry completely before using or storing the basket. Avoid using bleach or harsh chemicals, as they can damage the fabric and affect the basket’s performance.
Discovering the Advantages of Plastic Proofing Baskets
Plastic proofing baskets have gained popularity among home bakers due to their durability, accessibility, and ease of use. Let’s explore the advantages these baskets offer and why they might be the perfect choice for your bread-making adventures.
Durability and Longevity
One of the primary advantages of plastic proofing baskets is their durability. These baskets are made from food-grade plastic that is resistant to wear and tear over time. Unlike natural wicker baskets, which can become brittle and break over time, plastic baskets retain their shape and structure even after multiple uses. This durability ensures that you can rely on your plastic basket for countless baking sessions without worrying about it deteriorating.
Affordability and Accessibility
Plastic proofing baskets are often more affordable compared to other materials like natural wicker or fabric-lined baskets. This affordability makes them an accessible choice for beginner bakers or those on a budget. Additionally, plastic baskets are widely available in most kitchenware stores or online platforms, making it easier to find and purchase them.
Easy Cleaning
Cleaning a plastic proofing basket is a breeze compared to other materials. The smooth surface of the plastic prevents the dough from sticking, making it easier to release after proofing. If any residue remains in the basket, you can simply use warm soapy water and a sponge to remove it. Plastic baskets are also dishwasher safe, allowing for a quick and convenient cleaning process. This ease of cleaning ensures that your basket is always ready for your next baking adventure.
Preventing Sticking
One of the common challenges of using traditional wicker or fabric-lined baskets is the dough sticking to the surface. With plastic proofing baskets, this problem is minimized, thanks to their smooth and non-stick surface. The dough is less likely to cling to the sides, maintaining its shape and structure during proofing. This eliminates the need for excessive flour dusting or worrying about the dough losing its shape when you release it from the basket.

Getting Creative with Alternative Proofing Baskets
While traditional bread proofing baskets have their charm, sometimes it’s fun to get creative and think outside the box. Here are a few alternative proofing baskets that you can experiment with to add a unique touch to your bread-making process.
Colander Baskets
If you don’t have a dedicated bread proofing basket on hand, a colander can serve as a suitable alternative. Look for a colander with small holes to prevent the dough from spreading too much during proofing. Just like with other baskets, remember to dust the colander with flour to prevent sticking and shape your dough accordingly.
Oven-Safe Mixing Bowls
Oven-safe mixing bowls, especially ones with a rounded bottom, can work as makeshift bread proofing baskets. These bowls are often made from glass or stainless steel, allowing for easy cleanup and offering a sturdy structure for your dough. Just make sure to grease the inside of the bowl with oil or butter and dust it with flour before placing the dough.
Linen-lined Baking Sheets
If you want a flat, rustic-looking loaf, you can try using a linen-lined baking sheet as a proofing surface. Linen provides a breathable surface for your dough, allowing it to rise evenly. Simply shape your dough and place it on the linen-lined baking sheet, making sure to leave enough space for it to expand. Once the dough has finished proofing, you can transfer it to a baking stone or sheet for baking.
Homemade Improvisations
Don’t be afraid to get creative and think outside of the usual bread proofing basket options. You can experiment with different household items such as sieves, tea towels shaped into bowls, or even large mugs. As long as the chosen object can maintain the shape of your dough and allows for proper air circulation, it can serve as a unique proofing vessel.
Explaining the Importance of Proper Proofing
Now that we have explored different types of bread proofing baskets and alternative options, let’s take a moment to understand why proper proofing is crucial for your bread-making process.
What is Proofing?
Proofing, also known as fermentation, is the process of allowing the dough to rise after it has been shaped. During this time, the yeast in the dough consumes the sugars and produces carbon dioxide gas, causing the dough to expand and become lighter. This process is essential for the development of flavor, texture, and overall structure of the bread.
Importance of a Bread Proofing Basket
A bread proofing basket plays a vital role in the proofing process by supporting the dough and helping it retain its shape. The basket’s structure ensures that the dough rises evenly without spreading too much, resulting in a well-rounded loaf with a beautiful crust. Without a proper proofing basket, the dough’s structure may collapse or lose its shape during the rise, affecting the final outcome of your bread.
Role in Dough Development
Proper proofing not only allows the dough to rise but also helps develop its flavor and texture. During the fermentation process, enzymes in the dough break down the complex carbohydrates into simpler sugars, resulting in a more flavorful bread. Additionally, the gluten in the dough strengthens and becomes more elastic, contributing to the bread’s chewy texture. The bread proofing basket plays a crucial role in achieving these developments by providing support and allowing the dough to rise gradually.
Avoiding Common Proofing Mistakes
Using a bread proofing basket can help you avoid common proofing mistakes that could lead to disappointing results. Without a proper basket, the dough may spread too much or become misshapen during proofing, resulting in a flat or unevenly risen loaf. A basket provides the necessary structure and helps contain the dough while allowing it to rise evenly. By choosing the right bread proofing basket and following proper proofing techniques, you can ensure consistent and successful bread-making every time.

Step-by-step Guide to Using a Bread Proofing Basket
Now that you understand the importance of a bread proofing basket let’s walk through the process of using one effectively.
Prepare the Basket
Before using a bread proofing basket, it’s crucial to prepare it properly to prevent any sticking. Most natural wicker baskets may require a light dusting of flour to prevent the dough from clinging to the surface. Fabric-lined baskets usually don’t require additional flouring, as the fabric itself prevents sticking. Ensure that the entire surface of the basket is coated with flour or that the fabric is clean and dry before proceeding to the next step.
Shape the Dough
Once your proofing basket is prepared, it’s time to shape your dough. Gently remove the dough from its container or bowl and place it onto a lightly floured work surface. Depending on the recipe, gently fold or shape the dough into the desired shape – be it round, oval, or any other shape that suits your preference. Consider the size of your proofing basket and shape the dough accordingly, making sure it’s not too big or too small.
Transfer and Cover
Carefully transfer the shaped dough into the prepared proofing basket. If the dough surface is sticky, lightly coat it with flour before placing it in the basket. Once the dough is in the basket, cover it with a clean kitchen towel or a plastic shower cap to prevent it from drying out and forming a crust. The covering also helps create a warm and humid environment for your dough to rise properly.
Monitor and Adjust
Place the covered dough in a draft-free area with a moderate temperature for proofing. The ideal temperature for proofing can vary depending on the recipe, but generally, a room temperature of around 75°F (24°C) is suitable. Keep an eye on the dough as it rises, checking periodically to see if it has doubled in size. The proofing time can range from a couple of hours to overnight, so be patient and allow the dough to rise at its own pace.
If you notice that the dough is rising too quickly or not rising enough, you can make adjustments to the proofing environment. If it’s rising too quickly, move the dough to a slightly cooler location or reduce the proofing time. On the other hand, if it’s not rising enough, you can increase the temperature slightly by placing the dough near a warm spot or using a proofing box. It’s essential to find the right balance and adapt to the specific requirements of your recipe.
Troubleshooting Common Proofing Problems
Even with the best intentions and careful techniques, proofing problems can still occur. Here are some common issues and troubleshooting tips to help you overcome them.
Over-proofing
Over-proofing occurs when the dough has been allowed to rise for too long, resulting in a flat, deflated loaf. The excess fermentation causes the gluten structure to weaken, leading to a loss of volume and texture. To prevent over-proofing, carefully monitor your dough during the proofing process. Check for signs of a properly proofed dough, such as a slight jiggle when gently shaken. If you suspect your dough is nearing over-proofing, it’s better to err on the side of caution and proceed to the next step sooner rather than later.
Under-proofing
Under-proofing happens when the dough hasn’t had enough time to rise and develop its flavor and structure fully. The resulting bread may have a denser texture and less pronounced flavor. To avoid under-proofing, make sure to give your dough enough time to rise. Follow the recipe guidelines and monitor the dough closely. Look for signs of a properly proofed dough, such as a visible increase in size and a finger poke test that leaves a slight indentation.
Sticking to the Basket
Having your dough stick to the proofing basket can be frustrating and can ruin the loaf’s shape and surface. To prevent sticking, ensure that your proofing basket is properly prepared with flour or a non-stick lining. Avoid using excessive flour, as this can create a thick crust and affect the loaf’s appearance. If your dough still sticks, gently release it using a bench scraper or your fingers. Be careful not to deflate or disturb the dough too much during the process.
Uneven Rising
Uneven rising occurs when the dough rises more in certain areas, resulting in an irregularly shaped loaf. This issue can be caused by factors such as uneven dough shaping or an uneven proofing environment. To promote even rising, make sure to shape your dough evenly and distribute the tension properly. Place the proofing basket in a draft-free area with consistent temperatures throughout. If you notice uneven rising, gently reshape the dough before baking to encourage a more uniform appearance.

Cleaning and Storing Bread Proofing Baskets
Proper cleaning and storage of your bread proofing basket are essential to maintain its longevity and ensure food safety. Here are some recommended methods for cleaning and storing different types of bread proofing baskets.
Basket Cleaning Methods
For natural wicker baskets, cleaning is a bit more delicate. After each use, gently remove excess flour by tapping the basket outside or using a soft brush. If there are any stubborn residues, gently scrub them off using warm water and a soft sponge. Avoid using soap or harsh chemicals, as they can damage the wicker. Once the basket is cleaned, allow it to air dry thoroughly before storing.
Cleaning fabric-lined baskets is relatively easy. Remove any loose flour or debris by shaking or gently brushing it off. If the fabric lining requires additional cleaning, you can rinse it with warm water and a mild detergent. Avoid using bleach or soaking the fabric for an extended period. After cleaning, air dry the basket completely to prevent mold or mildew growth.
Plastic proofing baskets are the easiest to clean. They are usually dishwasher safe, making the cleaning process quick and convenient. If you prefer handwashing, use warm soapy water and a soft sponge to remove any residue. Once cleaned, allow the basket to air dry or dry it with a soft cloth before storing.
Drying and Storing
Regardless of the type of bread proofing basket, proper drying is crucial before storing. Make sure the basket is completely dry to avoid mold or musty odors. Allow the basket to air dry in a well-ventilated area. Avoid placing it in direct sunlight or near a heat source, as this can cause warping or damage to the basket. Once dry, store the basket in a cool, dry place away from any moisture or humidity.
For natural wicker baskets, it’s important to keep them from drying out too much. You can lightly oil the basket periodically to maintain its flexibility and prevent it from becoming brittle. Use food-safe oils such as vegetable oil or coconut oil, and apply a thin layer to the basket using a clean cloth. This helps nourish the wicker and prolong its lifespan.
Maintaining Basket Longevity
To ensure the longevity of your bread proofing basket, follow these general maintenance tips:
- Avoid exposing the basket to extreme temperatures, as this can cause warping or damage.
- Avoid using sharp objects or utensils that can scratch or pierce the basket.
- Store the basket in a dry and well-ventilated area to prevent mold or mildew growth.
- Clean the basket thoroughly before storing to remove any residue or food particles.
- Periodically inspect the basket for any signs of wear and tear and replace if necessary.
- Treat your basket with care and handle it gently to prevent any unnecessary damage.
By following these guidelines, you can enjoy your bread proofing basket for years to come and continue creating delicious homemade bread.
Choosing the Right Bread Proofing Basket for You
Now that we have explored the different types of bread proofing baskets and the factors to consider, it’s time to choose the one that suits your baking style and preferences.
Consider Your Baking Style
Think about the types of bread you enjoy baking the most and the shapes and sizes you prefer. If you love making traditional round loaves or boules, a round wicker basket or fabric-lined basket can be a great choice. If you prefer longer, more oblong shapes like batards or baguettes, an oval or rectangular basket would be more suitable. Consider the versatility of the basket and how it aligns with your baking style.
Personal Preferences
Your personal preferences play a significant role in choosing the right bread proofing basket. Consider the material you find most appealing and enjoyable to work with. If you appreciate the charm of traditional baking techniques, a natural wicker basket may be the perfect fit. If you prefer modern convenience and easy cleaning, a plastic proofing basket might be more suitable. Fabric-lined baskets offer a combination of both, providing style and functionality.
Budget and Accessibility
Consider your budget and accessibility when choosing a bread proofing basket. Natural wicker baskets and fabric-lined baskets can be slightly pricier compared to plastic options. If you’re just starting with bread baking or prefer to experiment with different shapes and sizes, a plastic proofing basket can be a cost-effective and easily accessible choice. However, if you’re looking for a long-term investment and appreciate the craftsmanship of natural materials, investing in a high-quality wicker or fabric-lined basket may be worth it.
Experimentation and Variety
Don’t be afraid to experiment and try different types of bread proofing baskets. Each material offers unique benefits that can enhance your bread-making experience in different ways. You can start with one type of basket and gradually expand your collection as you explore different bread recipes and bread shapes. Having a variety of baskets allows you to adapt to specific recipes and bake a wide range of delicious bread that suits your preferences.
In the end, choosing the right bread proofing basket is a personal decision that depends on your baking style, preferences, and budget. Consider the material, size, shape, and style that aligns with your needs and have fun experimenting with different options. A well-chosen bread proofing basket can elevate your bread-making experience and help you achieve those beautiful, artisan-style loaves that will impress your family and friends. Happy baking!


