Are you tired of traditional bread-making methods and looking for a convenient alternative? Look no further than the Kitchenaid Bread Bowl with Baking Lid. This innovative kitchen tool combines the functionality of a bread bowl with the convenience of a baking lid, allowing you to effortlessly create delicious homemade bread. From crusty artisan loaves to fluffy sandwich bread, the possibilities are endless with the Kitchenaid Bread Bowl with Baking Lid. Say goodbye to complicated recipes and hello to a world of baking simplicity. Get ready to elevate your bread-making game with these tantalizing recipes!

Baking Bread with the Kitchenaid Bread Bowl
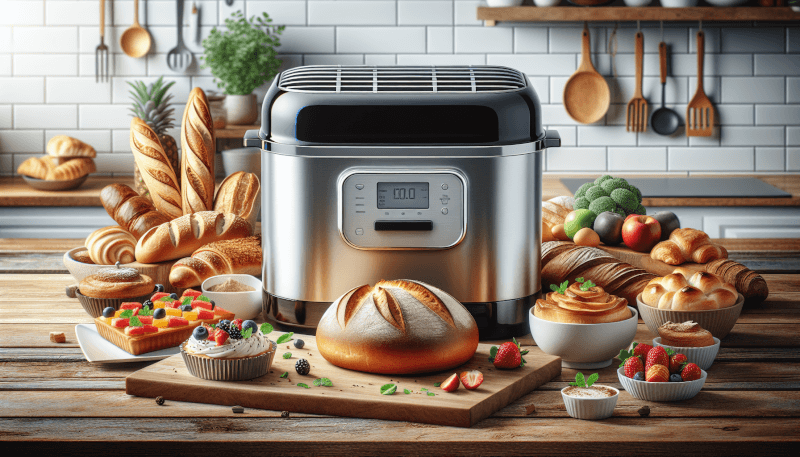
Introduction to the Kitchenaid Bread Bowl
If you’re an avid baker or just looking to try your hand at homemade bread, the Kitchenaid Bread Bowl is a must-have tool in your kitchen. This versatile and durable bowl is specifically designed to assist you in creating the perfect loaf of bread, whether you’re a novice or an experienced bread baker. With its large capacity and sturdy construction, the Kitchenaid Bread Bowl provides you with a reliable and efficient way to mix, knead, and proof your dough all in one convenient bowl.
Benefits of Using the Kitchenaid Bread Bowl
One of the biggest advantages of using the Kitchenaid Bread Bowl is its convenience. This bowl is specifically designed to fit perfectly with your Kitchenaid stand mixer, allowing you to effortlessly mix and knead your dough without the need for additional tools or equipment. The large capacity of the bowl also means that you can make bigger batches of bread or other baked goods, making it perfect for large families or entertaining guests.
Another benefit of the Kitchenaid Bread Bowl is its durability. Made from high-quality materials, this bowl is built to last. It can withstand the rigors of regular use without losing its shape or integrity. The non-stick interior ensures that your dough doesn’t stick to the sides, making it easier to work with and clean up afterward. Additionally, the Bread Bowl is dishwasher safe, saving you time and effort when it comes to cleaning up after your baking adventures.
Essential Equipment and Ingredients
Before you dive into baking with the Kitchenaid Bread Bowl, make sure you have all the necessary equipment and ingredients at hand. Here are the essentials you’ll need:
- Kitchenaid Bread Bowl: The star of the show, this bowl is the primary tool for mixing, kneading, and proofing your dough.
- Kitchenaid Stand Mixer: This powerful appliance will help make the mixing and kneading process a breeze.
- Measuring Cups and Spoons: Accurate measurements are crucial for successful bread baking.
- Bread Flour: This is the ideal flour for bread baking as it has a higher protein content, resulting in a better rise and texture.
- Yeast: The leavening agent that will help your bread dough rise and develop flavor.
- Salt: Essential for enhancing the flavor of your bread.
- Water or Other Liquid: Depending on the recipe, you’ll need water or another liquid, such as milk or buttermilk, to hydrate your dough.
- Additional ingredients: Depending on the recipe you choose, you may need ingredients like spices, herbs, cheese, fruits, or nuts to add flavor and texture to your bread.
Basic Bread Recipe for the Kitchenaid Bread Bowl
Now that you have all the necessary equipment and ingredients, it’s time to try your hand at baking bread in the Kitchenaid Bread Bowl. Here’s a basic bread recipe to get you started:
Ingredients:
- 4 cups bread flour
- 2 teaspoons active dry yeast
- 2 teaspoons salt
- 2 cups warm water
Instructions:
- In the Kitchenaid Bread Bowl, combine the bread flour, yeast, and salt. Stir to combine.
- Attach the bowl to your Kitchenaid Stand Mixer fitted with the dough hook attachment.
- With the mixer on low speed, gradually add the warm water to the dry ingredients. Mix until a sticky dough forms.
- Increase the mixer speed to medium-low and continue to knead the dough for about 7-10 minutes, or until it becomes smooth and elastic.
- Remove the dough from the mixer and shape it into a ball. Place it back into the Bread Bowl.
- Cover the bowl with a clean kitchen towel and let the dough rise in a warm, draft-free place for about 1-2 hours or until doubled in size.
- Once the dough has risen, gently punch it down to release any air bubbles.
- Shape the dough into a loaf or desired shape and place it on a baking sheet or in a greased loaf pan.
- Cover the dough again and let it rise for an additional 30-60 minutes, or until it has risen again.
- Preheat your oven to 425°F (220°C). Bake the bread for 25-30 minutes or until it’s golden brown and sounds hollow when tapped on the bottom.
- Remove the bread from the oven and let it cool on a wire rack before slicing and serving.
With this basic bread recipe, you’ll have a delicious homemade loaf that’s perfect for sandwiches, toast, or simply enjoying fresh out of the oven.
Savory Bread Recipes
Rosemary and Garlic Bread
If you’re a fan of savory flavors, this Rosemary and Garlic Bread is an absolute must-try. The combination of fragrant rosemary and pungent garlic creates a deliciously aromatic bread that pairs well with soups, stews, or as a standalone appetizer.
Ingredients:
- 4 cups bread flour
- 2 teaspoons active dry yeast
- 2 teaspoons salt
- 2 cups warm water
- 2 tablespoons fresh rosemary, chopped
- 4 cloves garlic, minced
Instructions:
- Follow the basic bread recipe above, adding the chopped rosemary and minced garlic to the dry ingredients before mixing.
- Continue with the remaining steps outlined in the basic bread recipe to knead, rise, and bake the bread.
The result will be a crusty, flavorful bread with hints of rosemary and garlic in every bite.
Cheese and Herb Bread
If you’re looking to add a cheesy twist to your bread, this Cheese and Herb Bread is a winner. The combination of gooey melted cheese and fragrant herbs creates a bread that’s perfect for serving alongside pasta dishes or as a tasty snack on its own.
Ingredients:
- 4 cups bread flour
- 2 teaspoons active dry yeast
- 2 teaspoons salt
- 2 cups warm water
- 1 cup shredded cheese (cheddar, mozzarella, or your favorite cheese)
- 2 tablespoons fresh herbs (such as parsley, thyme, or chives), chopped
Instructions:
- Follow the basic bread recipe above, adding the shredded cheese and fresh herbs to the dry ingredients before mixing.
- Continue with the remaining steps outlined in the basic bread recipe to knead, rise, and bake the bread.
The resulting bread will have a savory, cheesy flavor that’s sure to please cheese lovers.
Sun-Dried Tomato and Basil Bread
For a bread that’s bursting with Mediterranean flavors, try this Sun-Dried Tomato and Basil Bread. The combination of tangy sun-dried tomatoes and aromatic basil creates a bread that’s perfect for sandwiches, bruschetta, or as a complement to a classic Caprese salad.
Ingredients:
- 4 cups bread flour
- 2 teaspoons active dry yeast
- 2 teaspoons salt
- 2 cups warm water
- 1/2 cup sun-dried tomatoes, rehydrated and chopped
- 2 tablespoons fresh basil, chopped
Instructions:
- Follow the basic bread recipe above, adding the rehydrated and chopped sun-dried tomatoes and fresh basil to the dry ingredients before mixing.
- Continue with the remaining steps outlined in the basic bread recipe to knead, rise, and bake the bread.
The resulting bread will have a vibrant red color and a delightful flavor that’s reminiscent of the Mediterranean.
Olive and Feta Bread
For a bread that’s full of Mediterranean flair, try this Olive and Feta Bread. The combination of salty, briny olives and tangy feta cheese creates a bread that’s perfect for serving alongside Greek dishes, salads, or as a delicious snack.
Ingredients:
- 4 cups bread flour
- 2 teaspoons active dry yeast
- 2 teaspoons salt
- 2 cups warm water
- 1 cup pitted olives (such as Kalamata or green olives), chopped
- 1/2 cup crumbled feta cheese
Instructions:
- Follow the basic bread recipe above, adding the chopped olives and crumbled feta cheese to the dry ingredients before mixing.
- Continue with the remaining steps outlined in the basic bread recipe to knead, rise, and bake the bread.
The resulting bread will be packed with the flavors of the Mediterranean and will add a delightful twist to any meal.
Sweet Bread Recipes
Cinnamon Raisin Bread
If you have a sweet tooth, this Cinnamon Raisin Bread is sure to satisfy your cravings. The combination of warm cinnamon and juicy raisins creates a bread that’s perfect for toasting, slathering with butter, or making delicious French toast.
Ingredients:
- 4 cups bread flour
- 2 teaspoons active dry yeast
- 2 teaspoons salt
- 2 cups warm water
- 1/4 cup granulated sugar
- 1 tablespoon ground cinnamon
- 1 cup raisins
Instructions:
- Follow the basic bread recipe above, adding the granulated sugar, ground cinnamon, and raisins to the dry ingredients before mixing.
- Continue with the remaining steps outlined in the basic bread recipe to knead, rise, and bake the bread.
The resulting bread will be sweet, aromatic, and perfect for a cozy breakfast or brunch.
Chocolate Chip Banana Bread
Banana bread is a classic and beloved sweet treat, and this Chocolate Chip Banana Bread takes it to the next level. The combination of ripe bananas and gooey chocolate chips creates a bread that’s moist, flavorful, and utterly irresistible.
Ingredients:
- 4 cups bread flour
- 2 teaspoons active dry yeast
- 2 teaspoons salt
- 2 cups warm water
- 1 cup mashed ripe bananas (about 2 large bananas)
- 1/2 cup granulated sugar
- 1/2 cup packed brown sugar
- 1 cup chocolate chips
Instructions:
- Follow the basic bread recipe above, adding the mashed ripe bananas, granulated sugar, brown sugar, and chocolate chips to the dry ingredients before mixing.
- Continue with the remaining steps outlined in the basic bread recipe to knead, rise, and bake the bread.
The resulting bread will be moist, sweet, and filled with pockets of melted chocolate. It’s perfect for a decadent breakfast or as a comforting dessert.
Lemon Blueberry Bread
If you’re looking for a refreshing and tangy bread, this Lemon Blueberry Bread is the answer. The combination of bright lemon zest and juicy blueberries creates a bread that’s bursting with flavor and perfect for spring or summer gatherings.
Ingredients:
- 4 cups bread flour
- 2 teaspoons active dry yeast
- 2 teaspoons salt
- 2 cups warm water
- Zest of 2 lemons
- 1 cup fresh or frozen blueberries
Instructions:
- Follow the basic bread recipe above, adding the lemon zest and blueberries to the dry ingredients before mixing.
- Continue with the remaining steps outlined in the basic bread recipe to knead, rise, and bake the bread.
The resulting bread will have a lovely citrus aroma and the burst of blueberries in every bite will make it a family favorite.
Pumpkin Spice Bread
Fall is the perfect time to indulge in the warm and cozy flavors of pumpkin, and this Pumpkin Spice Bread is the epitome of comfort. The combination of aromatic spices and pureed pumpkin creates a bread that’s moist, fragrant, and perfect for enjoying with a cup of coffee or tea.
Ingredients:
- 4 cups bread flour
- 2 teaspoons active dry yeast
- 2 teaspoons salt
- 2 cups warm water
- 1 cup canned pumpkin puree
- 1/2 cup granulated sugar
- 1/2 cup packed brown sugar
- 1 teaspoon ground cinnamon
- 1/2 teaspoon ground nutmeg
- 1/4 teaspoon ground cloves
Instructions:
- Follow the basic bread recipe above, adding the canned pumpkin puree, granulated sugar, brown sugar, cinnamon, nutmeg, and cloves to the dry ingredients before mixing.
- Continue with the remaining steps outlined in the basic bread recipe to knead, rise, and bake the bread.
The resulting bread will have a beautiful orange color, a lovely spice aroma, and the perfect amount of sweetness.

Gluten-Free Bread Recipes
Basic Gluten-Free Bread
For those with gluten sensitivities or dietary restrictions, this Basic Gluten-Free Bread recipe is a game-changer. The combination of gluten-free flours and xanthan gum creates a bread that’s light, fluffy, and deliciously gluten-free.
Ingredients:
- 2 cups gluten-free all-purpose flour
- 1 cup gluten-free oat flour
- 1/2 cup tapioca flour
- 2 teaspoons active dry yeast
- 2 teaspoons xanthan gum
- 1 teaspoon salt
- 2 cups warm water
- 2 tablespoons olive oil
- 2 tablespoons honey or maple syrup
- 4 large eggs
Instructions:
- In the Kitchenaid Bread Bowl, combine the gluten-free all-purpose flour, gluten-free oat flour, tapioca flour, active dry yeast, xanthan gum, and salt. Stir to combine.
- Attach the bowl to your Kitchenaid Stand Mixer fitted with the paddle attachment.
- In a separate bowl, whisk together the warm water, olive oil, honey or maple syrup, and eggs.
- With the mixer on low speed, gradually add the wet ingredients to the dry ingredients. Mix until a thick, sticky dough forms.
- Increase the mixer speed to medium-low and continue to mix the dough for about 4-5 minutes.
- Remove the paddle attachment and replace it with the dough hook attachment.
- Continue mixing the dough on medium-low speed with the dough hook for an additional 2-3 minutes.
- Remove the dough from the mixer and shape it into a ball. Place it back into the Bread Bowl.
- Cover the bowl with a clean kitchen towel and let the dough rise in a warm, draft-free place for about 1-2 hours or until doubled in size.
- Once the dough has risen, gently punch it down to release any air bubbles.
- Shape the dough into a loaf or desired shape and place it on a baking sheet or in a greased loaf pan.
- Cover the dough again and let it rise for an additional 30-60 minutes, or until it has risen again.
- Preheat your oven to 375°F (190°C). Bake the bread for 30-35 minutes or until it’s golden brown and sounds hollow when tapped on the bottom.
- Remove the bread from the oven and let it cool on a wire rack before slicing and serving.
This gluten-free bread recipe will provide you with a delicious and satisfying loaf that can be enjoyed by those with gluten sensitivities or anyone looking to explore gluten-free baking.
Buckwheat and Quinoa Bread
For a hearty and nutritious gluten-free bread, try this Buckwheat and Quinoa Bread recipe. The combination of these two nutrient-dense grains creates a bread that’s packed with flavor, fiber, and essential minerals.
Ingredients:
- 2 cups buckwheat flour
- 1 cup quinoa flour
- 1/2 cup tapioca flour
- 2 teaspoons active dry yeast
- 2 teaspoons xanthan gum
- 1 teaspoon salt
- 2 cups warm water
- 2 tablespoons olive oil
- 2 tablespoons honey or maple syrup
- 4 large eggs
Instructions:
- Follow the same instructions as the Basic Gluten-Free Bread recipe above, using the specified amounts of buckwheat flour, quinoa flour, and tapioca flour instead of the gluten-free all-purpose flour and gluten-free oat flour.
The resulting bread will have a robust flavor and a dense, yet tender, texture that pairs well with your favorite spreads or enjoyed on its own.
Almond Flour Bread
For a bread that’s rich in healthy fats and low in carbohydrates, this Almond Flour Bread is a winner. The combination of almond flour and flaxseed meal creates a bread that’s gluten-free, grain-free, and perfect for those following a low-carb or paleo lifestyle.
Ingredients:
- 2 cups almond flour
- 1/2 cup flaxseed meal
- 1/4 cup coconut flour
- 2 teaspoons baking powder
- 1/2 teaspoon salt
- 4 large eggs
- 1/4 cup coconut oil, melted
- 2 tablespoons honey or maple syrup
- 1/2 cup warm water
Instructions:
- In the Kitchenaid Bread Bowl, combine the almond flour, flaxseed meal, coconut flour, baking powder, and salt. Stir to combine.
- Attach the bowl to your Kitchenaid Stand Mixer fitted with the paddle attachment.
- In a separate bowl, whisk together the eggs, melted coconut oil, honey or maple syrup, and warm water.
- With the mixer on low speed, gradually add the wet ingredients to the dry ingredients. Mix until a thick, slightly sticky dough forms.
- Remove the paddle attachment and replace it with the dough hook attachment.
- Continue mixing the dough on low speed with the dough hook for an additional 2-3 minutes.
- Remove the dough from the mixer and shape it into a ball. Place it back into the Bread Bowl.
- Cover the bowl with a clean kitchen towel and let the dough rise in a warm, draft-free place for about 1-2 hours or until doubled in size.
- Once the dough has risen, gently punch it down to release any air bubbles.
- Shape the dough into a loaf or desired shape and place it on a baking sheet or in a greased loaf pan.
- Cover the dough again and let it rise for an additional 30-60 minutes, or until it has risen again.
- Preheat your oven to 350°F (175°C). Bake the bread for 40-45 minutes or until it’s lightly golden brown and sounds hollow when tapped on the bottom.
- Remove the bread from the oven and let it cool on a wire rack before slicing and serving.
This almond flour bread makes a delicious and satisfying alternative for those who are following a low-carb or grain-free lifestyle.
Oatmeal and Seed Bread
For a gluten-free bread that’s packed with fiber and heart-healthy fats, give this Oatmeal and Seed Bread a try. The combination of gluten-free oats, seeds, and a touch of honey creates a bread that’s nutritious, flavorful, and perfect for your morning toast or sandwiches.
Ingredients:
- 2 cups gluten-free oats, ground into flour
- 3/4 cup gluten-free oat flour
- 1/4 cup flaxseed meal
- 1/4 cup chia seeds
- 1/4 cup pumpkin seeds
- 1/4 cup sunflower seeds
- 1/4 cup sesame seeds
- 2 teaspoons baking powder
- 1/2 teaspoon salt
- 4 large eggs
- 1/4 cup melted coconut oil or olive oil
- 2 tablespoons honey or maple syrup
- 1 cup warm water
Instructions:
- In the Kitchenaid Bread Bowl, combine the ground gluten-free oats, oat flour, flaxseed meal, chia seeds, pumpkin seeds, sunflower seeds, sesame seeds, baking powder, and salt. Stir to combine.
- Attach the bowl to your Kitchenaid Stand Mixer fitted with the paddle attachment.
- In a separate bowl, whisk together the eggs, melted coconut oil or olive oil, honey or maple syrup, and warm water.
- With the mixer on low speed, gradually add the wet ingredients to the dry ingredients. Mix until a thick, slightly sticky dough forms.
- Remove the paddle attachment and replace it with the dough hook attachment.
- Continue mixing the dough on low speed with the dough hook for an additional 2-3 minutes.
- Remove the dough from the mixer and shape it into a ball. Place it back into the Bread Bowl.
- Cover the bowl with a clean kitchen towel and let the dough rise in a warm, draft-free place for about 1-2 hours or until doubled in size.
- Once the dough has risen, gently punch it down to release any air bubbles.
- Shape the dough into a loaf or desired shape and place it on a baking sheet or in a greased loaf pan.
- Cover the dough again and let it rise for an additional 30-60 minutes, or until it has risen again.
- Preheat your oven to 350°F (175°C). Bake the bread for 40-45 minutes or until it’s lightly golden brown and sounds hollow when tapped on the bottom.
- Remove the bread from the oven and let it cool on a wire rack before slicing and serving.
This oatmeal and seed bread will provide you with a delicious and fiber-rich option for those following a gluten-free or high-fiber diet.
Specialty Bread Recipes
Artisan Sourdough Bread
If you’re looking to take your bread baking skills to the next level, try your hand at making this Artisan Sourdough Bread. Sourdough bread is known for its tangy flavor and unique texture, and with the help of the Kitchenaid Bread Bowl, you’ll be able to create your very own artisanal loaf that rivals those from a professional bakery.
Ingredients:
- 4 cups bread flour
- 1 1/2 cups water
- 1 cup sourdough starter (active and bubbly)
- 2 teaspoons salt
Instructions:
- In the Kitchenaid Bread Bowl, combine the bread flour, water, sourdough starter, and salt. Stir to combine.
- Attach the bowl to your Kitchenaid Stand Mixer fitted with the dough hook attachment.
- Mix the dough on low speed for about 5 minutes or until it becomes smooth and elastic. The dough will be sticky at this point.
- Cover the bowl with a clean kitchen towel and let the dough rest for 30 minutes.
- After 30 minutes, fold the dough over onto itself several times to develop the gluten.
- Cover the bowl again and let the dough rise at room temperature for about 2-4 hours, or until it has doubled in size. You can also choose to let it rise overnight in the refrigerator for a longer fermentation process and enhanced flavor.
- Once the dough has risen, gently transfer it onto a well-floured surface and shape it into a ball.
- Place the dough onto a well-floured proofing basket or a lined baking sheet and cover it with a clean kitchen towel. Let it rise for an additional 2-3 hours or until it has risen again.
- Preheat your oven to 475°F (245°C) with a Dutch oven or a heavy-bottomed pot inside.
- Carefully transfer the risen dough into the preheated Dutch oven or pot, placing it seam side down. Score the top of the dough with a sharp knife to allow for expansion during baking.
- Cover the Dutch oven or pot with its lid and bake the bread for 30 minutes.
- Remove the lid and continue to bake the bread for an additional 15-20 minutes or until it’s golden brown and has a crisp crust.
- Remove the bread from the oven and let it cool on a wire rack before slicing and serving.
Making artisan sourdough bread requires time, patience, and practice, but the end result is a loaf of bread that’s deeply flavorful, has a chewy crust, and a soft, airy crumb.
Pumpernickel Bread
For a rich and hearty bread that’s perfect for sandwiches or as a complement to a cheese platter, try this Pumpernickel Bread recipe. Pumpernickel bread is known for its deep, dark color and distinctive flavor, and with the Kitchenaid Bread Bowl, you’ll be able to achieve the perfect texture and taste every time.
Ingredients:
- 2 cups bread flour
- 1 cup rye flour
- 1 cup whole wheat flour
- 3 tablespoons cocoa powder
- 2 teaspoons active dry yeast
- 2 teaspoons salt
- 1 tablespoon molasses
- 1 tablespoon caraway seeds (optional)
- 2 cups warm water
Instructions:
- In the Kitchenaid Bread Bowl, combine the bread flour, rye flour, whole wheat flour, cocoa powder, active dry yeast, salt, molasses, and caraway seeds. Stir to combine.
- Attach the bowl to your Kitchenaid Stand Mixer fitted with the dough hook attachment.
- With the mixer on low speed, gradually add the warm water to the dry ingredients. Mix until a sticky dough forms.
- Increase the mixer speed to medium-low and continue to knead the dough for about 7-10 minutes, or until it becomes smooth and elastic.
- Remove the dough from the mixer and shape it into a ball. Place it back into the Bread Bowl.
- Cover the bowl with a clean kitchen towel and let the dough rise in a warm, draft-free place for about 1-2 hours or until doubled in size.
- Once the dough has risen, gently punch it down to release any air bubbles.
- Shape the dough into a loaf or desired shape and place it on a baking sheet or in a greased loaf pan.
- Cover the dough again and let it rise for an additional 30-60 minutes, or until it has risen again.
- Preheat your oven to 375°F (190°C). Bake the bread for 30-35 minutes or until it’s dark brown and sounds hollow when tapped on the bottom.
- Remove the bread from the oven and let it cool on a wire rack before slicing and serving.
This pumpernickel bread will have a deep, rich flavor and a dense texture that’s perfect for a variety of sandwiches and spreads.
Challah Bread
For a bread that’s both beautiful and delicious, try making this Challah Bread. Challah is a traditional Jewish bread that’s often enjoyed during special occasions or holidays, and with the Kitchenaid Bread Bowl, you’ll be able to create a perfectly braided loaf that’s both visually stunning and incredibly tasty.
Ingredients:
- 4 cups bread flour
- 2 teaspoons active dry yeast
- 2 teaspoons salt
- 2 tablespoons granulated sugar
- 2 tablespoons vegetable oil
- 1 1/2 cups warm water
- 3 large eggs, plus 1 for egg wash
- Poppy or sesame seeds for topping (optional)
Instructions:
- In the Kitchenaid Bread Bowl, combine the bread flour, active dry yeast, salt, and granulated sugar. Stir to combine.
- Attach the bowl to your Kitchenaid Stand Mixer fitted with the dough hook attachment.
- With the mixer on low speed, gradually add the vegetable oil, warm water, and 3 eggs to the dry ingredients. Mix until a sticky dough forms.
- Increase the mixer speed to medium-low and continue to knead the dough for about 7-10 minutes, or until it becomes smooth and elastic.
- Remove the dough from the mixer and shape it into a ball. Place it back into the Bread Bowl.
- Cover the bowl with a clean kitchen towel and let the dough rise in a warm, draft-free place for about 1-2 hours or until doubled in size.
- Once the dough has risen, gently punch it down to release any air bubbles.
- Divide the dough into three equal parts and shape each part into a long rope.
- Pinch the ends of the three ropes together and braid them, tucking the ends under the loaf.
- Place the braided loaf on a baking sheet lined with parchment paper. Cover the loaf with a clean kitchen towel and let it rise for an additional 30-60 minutes, or until it has risen again.
- Preheat your oven to 375°F (190°C).
- In a small bowl, beat the remaining egg. Brush the surface of the loaf with the beaten egg.
- If desired, sprinkle the top of the loaf with poppy or sesame seeds.
- Bake the bread for 20-25 minutes or until it’s golden brown and sounds hollow when tapped on the bottom.
- Remove the bread from the oven and let it cool on a wire rack before slicing and serving.
Challah bread is perfect for sharing and makes a beautiful centerpiece at any gathering or holiday table.
Hawaiian Sweet Bread
For a bread that’s soft, pillowy, and subtly sweet, this Hawaiian Sweet Bread is a crowd-pleaser. Known for its light texture and hint of tropical flavor, this bread is perfect for enjoying as dinner rolls, sandwich bread, or even as a base for homemade sliders.
Ingredients:
- 4 cups bread flour
- 2 teaspoons active dry yeast
- 2 teaspoons salt
- 1/4 cup granulated sugar
- 1/4 cup unsalted butter, melted
- 1 cup warm milk
- 1/4 cup pineapple juice
- 2 large eggs
Instructions:
- In the Kitchenaid Bread Bowl, combine the bread flour, active dry yeast, salt, and granulated sugar. Stir to combine.
- Attach the bowl to your Kitchenaid Stand Mixer fitted with the dough hook attachment.
- With the mixer on low speed, gradually add the melted unsalted butter, warm milk, pineapple juice, and eggs to the dry ingredients. Mix until a sticky dough forms.
- Increase the mixer speed to medium-low and continue to knead the dough for about 7-10 minutes, or until it becomes smooth and elastic.
- Remove the dough from the mixer and shape it into a ball. Place it back into the Bread Bowl.
- Cover the bowl with a clean kitchen towel and let the dough rise in a warm, draft-free place for about 1-2 hours or until doubled in size.
- Once the dough has risen, gently punch it down to release any air bubbles.
- Divide the dough into equal parts and shape each part into desired shapes, such as rolls or loaves.
- Place the shaped dough on a baking sheet lined with parchment paper. Cover the dough with a clean kitchen towel and let it rise for an additional 30-60 minutes, or until it has risen again.
- Preheat your oven to 350°F (175°C).
- Bake the bread for 20-25 minutes (for rolls) or 30-35 minutes (for loaves) or until they’re lightly golden brown and sound hollow when tapped on the bottom.
- Remove the bread from the oven and let it cool on a wire rack before serving.
Hawaiian Sweet Bread is a versatile bread that adapts well to both sweet and savory toppings, making it a favorite among bread lovers.
Tips and Tricks for Baking Bread with the Kitchenaid Bread Bowl
Proper Use and Care of the Bread Bowl
To ensure the best results when using the Kitchenaid Bread Bowl, it’s important to follow these tips and properly care for your bowl:
- Ensure the bowl is securely attached to your Kitchenaid Stand Mixer before adding the ingredients. This will prevent any accidents or spills.
- Before adding the ingredients, make sure the bowl is clean and dry. Any residual moisture or food particles can affect the texture and quality of your bread.
- Avoid overfilling the bowl. It’s important to leave enough space for the dough to rise. As a general rule, aim to fill the bowl no more than halfway to allow for proper expansion during the rising process.
- When mixing and kneading the dough, start at a low speed and gradually increase the speed as needed. This will help prevent the dough from splattering or overflowing from the bowl.
- Always follow the recommended mixing and kneading times provided in the recipe. Overmixing can result in a dense and tough bread, while undermixing may lead to uneven texture and incomplete incorporation of ingredients.
- After use, clean the Bread Bowl thoroughly by hand or using a dishwasher, depending on the manufacturer’s instructions. Be sure to remove any dough residue or flour particles to prevent contamination or odors.
- Store the Bread Bowl in a cool and dry place, away from direct sunlight, heat sources, or sharp objects that may damage the bowl’s surface. Proper storage will help prolong the lifespan of your bread bowl.
Achieving the Perfect Rise and Texture
The rise and texture of your bread are crucial factors in creating a delicious and satisfying loaf. Here are some tips to help you achieve the perfect rise and texture when using the Kitchenaid Bread Bowl:
- Follow the specified measurements and instructions in the recipe. Baking is a science, and precise measurements and techniques are essential for consistent results.
- Use the recommended ingredients, such as bread flour or gluten-free flour, as specified in the recipe. Different flours have different protein contents, which affect the bread’s structure and rise.
- Activate the yeast properly by dissolving it in warm water before adding it to the other ingredients. The water should be warm, not hot, to ensure the yeast remains active and doesn’t get killed off.
- Allow the dough to rise in a warm, draft-free environment. Yeast thrives in warm temperatures, typically around 75°F to 85°F (24°C to 29°C). You can create a warm environment by placing the covered dough in a turned-off oven with the light on or near a warm stovetop.
- Cover the rising dough with a clean kitchen towel or plastic wrap to prevent it from drying out and forming a dry crust.
- Avoid overproofing the dough. Overproofed dough may collapse or become too fragile to handle. Keep a close eye on the rising dough and follow the recommended rising times in the recipe.
- Gently punch down the risen dough to release any trapped air bubbles and redistribute the yeast for a more even rise.
- Shape the dough carefully and according to the instructions provided in the recipe. Proper shaping prevents air pockets and ensures even cooking and attractive presentation.
- Allow the shaped dough to rise again before baking. This final rise helps the dough achieve the desired texture and structure.
- Preheat the oven to the specified temperature before placing your dough inside. A preheated oven ensures even heat distribution and promotes a good rise and proper browning.
With these tips, you’ll be well on your way to achieving bakery-quality bread with a soft and tender texture.
Adding Mix-ins and Variations
One of the joys of baking bread is the endless possibilities for incorporating delicious mix-ins and variations. Here are some ideas to help you get creative with your Kitchenaid Bread Bowl:
- Nuts and Seeds: Add chopped nuts, such as walnuts or pecans, or a mix of seeds, such as pumpkin, sunflower, or flax seeds, for added crunch and nutrition.
- Dried Fruits: Mix in dried fruits, such as raisins, cranberries, or diced dried apricots, to add bursts of sweetness and texture to your bread.
- Spices and Herbs: Experiment with different spices and herbs, such as cinnamon, nutmeg, rosemary, or thyme, to infuse your bread with unique flavors and aromas.
- Cheese: Incorporate grated or cubed cheese, such as cheddar, Swiss, or feta, into your dough for a savory twist and gooey pockets of melted cheese.
- Sweeteners: Replace granulated sugar with alternative sweeteners, such as honey, maple syrup, or molasses, to add depth and richness to your bread.
- Citrus Zest: Add citrus zest, such as lemon, orange, or lime, to infuse your bread with refreshing and aromatic flavors.
- Whole Grains: Substitute a portion of the bread flour with whole grain flours, such as whole wheat or rye flour, for added fiber and nutrition.
- Seasonal Flavors: Embrace the flavors of each season by adding seasonal fruits, spices, or herbs to create unique bread variations.
Remember to adjust the recipe accordingly when adding mix-ins or variations, as the moisture content and rising times may be affected.
Topping and Finishing Techniques
The right toppings and finishing techniques can elevate the appearance and flavor of your bread. Here are some ideas to inspire your creative touch:
- Egg Wash: Beat an egg with a splash of water or milk and brush it over the surface of the bread before baking. This will create a shiny and golden crust.
- Seeds: Sprinkle sesame seeds, poppy seeds, or a mix of seeds onto the surface of the bread for added texture and visual appeal.
- Coarse Salt: For a touch of saltiness and a rustic look, sprinkle coarse sea salt or kosher salt over the bread before baking.
- Glaze: Create a sweet glaze by mixing powdered sugar with a small amount of milk or lemon juice. Drizzle the glaze over the cooled bread for a delightful finishing touch.
- Melted Butter: Brush melted butter over the warm bread for a glossy finish and added richness.
- Cinnamon Sugar: Coat the dough with a mixture of cinnamon and sugar before shaping and baking for a sweet and aromatic twist.
- Olive Oil and Herbs: Brush the top of the bread with olive oil and sprinkle with fresh or dried herbs, such as rosemary or thyme, for a Mediterranean flair.
Experiment with different combinations and techniques to create bread that’s visually stunning and bursting with flavor.
Sealing and Storing Bread with the Baking Lid
Introduction to the Baking Lid
The Baking Lid is a valuable accessory that complements the Kitchenaid Bread Bowl, helping to seal and store your bread with ease. It’s designed to fit snugly on top of the Bread Bowl, providing an airtight seal and protecting your freshly baked bread.
Benefits of Using the Baking Lid
Using the Baking Lid offers several benefits when it comes to sealing and storing your bread:
Freshness and Moisture Retention: The Baking Lid creates an airtight seal that helps retain the freshness and moisture of your bread, extending its shelf life and ensuring it stays soft and delicious for longer.
Protection from Contaminants: The Baking Lid provides a barrier against dust, debris, and other contaminants, keeping your bread clean and free from unwanted particles.
Convenience and Portability: With the Baking Lid, you can easily transport and store your bread without worrying about it getting squished, dried out, or damaged.
Reduced Food Waste: By sealing your bread with the Baking Lid, you can help reduce food waste by preserving it for longer periods, allowing you to enjoy every last slice.
Steps to Properly Seal and Store Bread
Follow these steps to ensure proper sealing and storing of your bread with the Baking Lid:
Allow your freshly baked bread to cool completely on a wire rack before sealing it with the Baking Lid. This will prevent condensation and maintain the desired texture.
Place the Baking Lid gently onto the Bread Bowl, ensuring a snug fit. The lid should sit securely and form a seal, preventing air from entering.
Store the sealed Bread Bowl in a cool and dry place, away from direct sunlight, heat sources, or moisture. Avoid placing it near the stove or refrigerator, as the temperature fluctuations may affect the quality of the bread.
If you need to store sliced bread, place a sheet of parchment paper or wax paper between the slices to prevent them from sticking together.
For longer storage, you can also choose to freeze your bread. Wrap the cooled, sealed bread tightly in plastic wrap or aluminum foil, then place it in a freezer bag. When ready to enjoy, thaw the bread at room temperature or gently heat it in a preheated oven.
By properly sealing and storing your bread with the Baking Lid, you can maximize its freshness, flavor, and shelf life, ensuring you can enjoy your homemade bread for days to come.
FAQs and Troubleshooting
Q: Can I use the Baking Lid with other types of bread bowls or mixing bowls? A: The Baking Lid is specifically designed to fit the Kitchenaid Bread Bowl and its unique dimensions. While it may not fit other types of bread bowls or mixing bowls perfectly, you can still try using it with similar-sized bowls to achieve a partial seal.
Q: Can I use the Baking Lid for bread that’s not baked in the Kitchenaid Bread Bowl? A: Absolutely! While the Baking Lid is made to fit the Kitchenaid Bread Bowl, you can use it to seal and store bread baked in other pans or loaf tins. Simply ensure that the size of your bread or loaf pan is compatible with the Baking Lid.
Q: How long can I store bread with the Baking Lid? A: When properly sealed and stored in the Bread Bowl with the Baking Lid, bread can stay fresh for up to 3-5 days, depending on the recipe and ingredients used. However, it’s always best to consume bread within the first few days for optimal taste and texture.
Q: My bread is getting moldy even with the Baking Lid. What could be the issue? A: If your bread is getting moldy despite the Baking Lid, there may be moisture trapped in the Bread Bowl or on the bread itself. Make sure the bread is completely cool before sealing, and ensure that the Bread Bowl is clean and dry before use. Additionally, storing the bread in a cool and dry place, away from excess humidity, will help prevent mold growth.
Q: How can I revive stale bread that has been stored with the Baking Lid? A: If your bread has become stale after storage, you can try reviving it by placing it in a preheated oven at a low temperature for a few minutes. This will help to re-crisp the crust and slightly moisten the bread, making it more enjoyable to eat.
By addressing these frequently asked questions and troubleshooting tips, you’ll be able to make the most of your Baking Lid and ensure your bread remains fresh and delicious.
Bread Bowl and Baking Lid Maintenance
Cleaning the Bread Bowl and Baking Lid
Proper cleaning and maintenance of your Kitchenaid Bread Bowl and Baking Lid will help ensure their longevity and keep them in optimal condition:
Hand Washing: After each use, hand wash the Bread Bowl and Baking Lid with warm, soapy water. Use a soft sponge or cloth to gently clean the surfaces, taking care not to scratch or damage the non-stick coating.
Dishwasher Cleaning: Both the Bread Bowl and Baking Lid are dishwasher safe, making cleaning a breeze. However, ensure that your dishwasher is compatible with the size and weight of the items to avoid any damage. Consult the manufacturer’s instructions for specific dishwasher guidelines.
Stuck-on Residue: If there are stubborn food particles or dough residue, soak the Bread Bowl and Baking Lid in warm, soapy water for a few minutes to loosen the debris. Use a non-abrasive sponge or brush to gently scrub away the residue.
Drying: After cleaning, thoroughly dry the Bread Bowl and Baking Lid before storing them. Use a clean kitchen towel or allow them to air dry completely to prevent moisture buildup and potential odors.
Storing: Once dry, store the Bread Bowl and Baking Lid in a cool and dry place. Avoid stacking heavy objects on top of them and protect them from sharp utensils or surfaces that may cause scratches or dents.
By following these cleaning and maintenance tips, you can ensure that your Bread Bowl and Baking Lid remain in excellent condition and provide you with reliable and enjoyable baking experiences for years to come.
Storage and Safety Tips
Proper storage and handling of your Kitchenaid Bread Bowl and Baking Lid are essential for their longevity and your safety. Keep the following tips in mind:
Dedicated Storage Space: Designate a specific area in your kitchen for storing the Bread Bowl and Baking Lid. This will help prevent accidental damage and ensure easy accessibility when you’re ready to bake.
Avoid Extreme Temperatures: Store the Bread Bowl and Baking Lid in a cool and dry place, away from direct sunlight and heat sources. Extreme temperatures can cause warping or damage to the materials.
Protect from Impact: Avoid dropping or banging the Bread Bowl and Baking Lid against hard surfaces, as this can cause dents or fractures. Handle them with care to ensure their longevity.
Sharp Object Avoidance: Keep the Bread Bowl and Baking Lid away from sharp knives or utensils that may scratch or damage the non-stick coating. Using silicone or wooden utensils is recommended for gentle handling.
Child Safety: Store the Bread Bowl and Baking Lid out of reach of children to prevent injuries or accidents. As with any kitchen tools or equipment, exercise caution and supervise children when using them.
Safe Handling: When using or cleaning the Bread Bowl and Baking Lid, be mindful of their hot surfaces to avoid burns or injuries. Always use oven mitts or pot holders when handling them after baking.
Prioritizing safety and proper storage will help ensure that your Kitchenaid Bread Bowl and Baking Lid provide you with many enjoyable and accident-free baking sessions.
Replacement and Spare Parts
Over time, certain components of your Kitchenaid Bread Bowl or Baking Lid may require replacement. Instead of replacing the entire set, you can often find individual spare parts to address specific needs. Here are some common replacement parts you may need:
Bread Bowl: If your Bread Bowl becomes scratched, dented, or worn out, you can often find a replacement bowl that fits your specific Kitchenaid Stand Mixer model. Consult the manufacturer’s website or authorized retailers for compatible replacement options.
Baking Lid: Should your Baking Lid become damaged or lost, a replacement lid can be purchased separately. Verify the model and compatibility with your Bread Bowl to ensure a proper fit.
Sealing Gasket: Over time, the sealing gasket on the Baking Lid may become worn or damaged. Check with the manufacturer or authorized service centers for the availability of spare parts, such as replacement sealing gaskets.
When seeking replacement parts, always check the manufacturer’s website or contact their customer support to ensure you purchase authentic parts that are compatible with your specific Bread Bowl and Baking Lid.
Inspiration for Using Leftover Bread
Homemade Croutons and Bread Crumbs
Don’t let your leftover bread go to waste! Transform it into delicious homemade croutons or bread crumbs for adding extra flavor and texture to your favorite dishes.
For croutons, simply cut your bread into bite-sized cubes and toss them with olive oil, herbs, and spices of your choice. Bake them in the oven at 350°F (175°C) until golden and crispy. These homemade croutons are perfect for adding to salads, soups, or even as a crunchy snack.
To make bread crumbs, tear the leftover bread into small pieces and place them on a baking sheet. Bake in the oven at 300°F (150°C) until the bread is fully dried out. Allow it to cool, then pulse it in a food processor or blender until you achieve the desired crumb texture. Store the bread crumbs in an airtight container and use them as a topping for casseroles, meatballs, or as a coating for chicken or fish.
French Toast and Bread Pudding
Leftover bread is the perfect base for indulgent and comforting treats like French toast and bread pudding. These classic dishes are great for using up stale bread and can be customized with a variety of flavors.
For French toast, whisk together eggs, milk, vanilla extract, and your favorite spices, such as cinnamon or nutmeg. Dip slices of the leftover bread into the egg mixture and cook them on a skillet or griddle until golden brown on both sides. Serve with maple syrup, fresh fruit, or a dusting of powdered sugar for a delicious breakfast or brunch.
For bread pudding, tear the leftover bread into small pieces and place them in a greased baking dish. In a separate bowl, whisk together eggs, milk, sugar, and your choice of flavors, such as vanilla extract, cinnamon, or chocolate chips. Pour the egg mixture over the bread, making sure it’s all soaked. Bake in the oven at 350°F (175°C) for about 30-40 minutes or until the bread pudding is set and golden brown. Serve warm with a drizzle of caramel sauce or a scoop of vanilla ice cream.
Panzanella Salad
Panzanella salad is a refreshing and flavorful dish that takes advantage of leftover bread. This Italian salad combines bread, tomatoes, cucumbers, onions, and fresh herbs for a satisfying and vibrant meal.
To make panzanella salad, tear the leftover bread into bite-sized pieces and place them in a large salad bowl. Add halved cherry tomatoes, sliced cucumbers, thinly sliced red onions, and fresh herbs such as basil or parsley. Drizzle with olive oil, balsamic vinegar, and a pinch of salt and pepper. Toss everything together until well combined and let the salad sit for about 15 minutes to allow the flavors to meld together. Serve as a light and refreshing lunch or as a side dish alongside grilled meats or fish.
Bruschetta and Crostini
Turn your leftover bread into delicious bruschetta or crostini for an appetizer or snack that’s both simple and satisfying.
For bruschetta, slice the bread into thick slices and toast them until golden and crisp. Rub the toasted bread with a clove of garlic and drizzle with olive oil. Top with diced tomatoes, fresh basil, and a sprinkle of salt and pepper. The result is a classic Italian snack that’s bursting with flavors and perfect for entertaining.
For crostini, slice the bread into thin rounds and toast them in the oven until crispy. Once toasted, you can top them with your favorite spreads, such as cheese, pesto, or tapenade. Arrange them on a platter for a bite-sized appetizer that’s sure to impress your guests.
Conclusion
Final Thoughts
Baking bread with the Kitchenaid Bread Bowl and Baking Lid opens up a world of possibilities in your own kitchen. From basic bread recipes to specialty breads, the Kitchenaid Bread Bowl provides a convenient and reliable tool to help you create perfect loaves every time. Whether you prefer savory or sweet breads, gluten-free options, or artisanal creations, the recipes and tips in this article will guide you on your bread baking journey.
Remember to experiment with different flavors, mix-ins, and toppings to create unique breads that suit your taste preferences. And don’t forget to utilize your leftover bread to make homemade croutons, French toast, or panzanella salad.
With the Kitchenaid Bread Bowl and Baking Lid, you’ll be well-equipped to become a confident and skilled bread baker, impressing family and friends with your homemade creations. Enjoy the process, savor the aroma of freshly baked bread, and take pride in every slice. Happy baking!
Continuing Your Bread Baking Journey
Now that you’ve discovered the joy of baking bread with the Kitchenaid Bread Bowl and Baking Lid, your journey has just begun. Continue to explore new recipes, techniques, and flavors to expand your bread baking repertoire. Experiment with different types of flour, try your hand at more complex breads like sourdough, or explore international bread recipes.
Stay curious, embrace the process, and never be afraid to put your own creative twist on your breads. With practice, you’ll become a master bread baker and delight in the satisfaction of sharing your delicious homemade loaves with loved ones.
So, grab your apron and let the aroma of freshly baked bread fill your kitchen as you embark on this wonderful baking adventure. Enjoy the journey and remember that every loaf is a labor of love.
