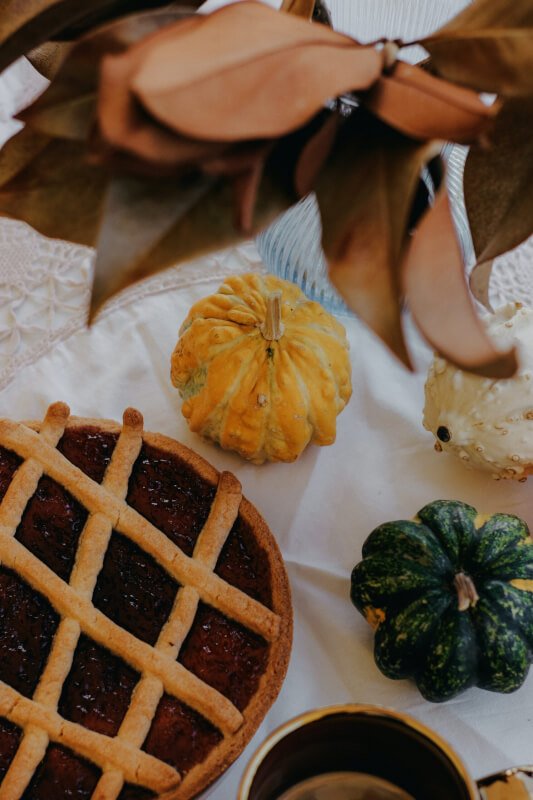
Have you ever been captivated by the beautiful lattice pattern on top of a freshly baked pie? The technique for creating lattice pie crusts is a delightful way to elevate the appearance of your homemade pies. With just a few simple steps, you can create a visually stunning masterpiece that is sure to impress your friends and family. Whether you’re a seasoned baker or a novice in the kitchen, this article will guide you through the process of creating a lattice pie crust, making your pies not only irresistible to taste but also a feast for the eyes. Creating a lattice pie crust may seem like a daunting task, but with the right technique and a little practice, you can achieve a beautiful and delicious result. In this article, we will guide you through the process step by step, from choosing the right pie crust recipe to baking and serving the final product. So, let’s get started on this pie-making adventure!

Choosing the Right Pie Crust Recipe
The first decision you need to make when it comes to creating a lattice pie crust is whether you want to use a homemade crust or opt for a store-bought one. Both options have their merits, so it ultimately depends on what you prefer and the amount of time you have available.
Homemade crusts allow for more customization and control over the ingredients used. You can choose to make a classic butter crust, a flaky shortening crust, or even experiment with alternative fats like coconut oil. Homemade crusts also give you the opportunity to add additional flavors and spices to complement your pie filling.
On the other hand, store-bought crusts offer convenience and time-saving benefits. They are pre-made and ready to use, which means you can focus your energy on the filling and lattice design. Store-bought crusts come in a variety of flavors, including traditional, chocolate, and graham cracker, allowing you to choose the one that best suits your pie.
Considering Different Crust Flavors
When it comes to the flavor of your crust, the possibilities are endless. A classic butter crust is a favorite for its rich and savory taste. However, if you’re looking for something different, you can experiment with different types of fats and additional ingredients.
For a nutty flavor, you can replace a portion of the butter or shortening with ground almonds or walnuts. This adds a subtle and delightful twist to your crust. If you have a sweet tooth, consider adding a touch of sugar or vanilla extract to the dough. This will give your pie crust a slightly sweet and aromatic taste that pairs well with fruity or creamy fillings.
Additionally, you can incorporate spices like cinnamon, nutmeg, or cardamom into your crust for a warm and cozy flavor. These spices work particularly well in fall and winter pies, adding an extra layer of comfort to your baked goods.
Understanding the Importance of a Buttery Texture
When it comes to a perfect pie crust, achieving a buttery and flaky texture is crucial. This texture is what sets a good pie crust apart from a great one. It creates a delicate and light pastry that melts in your mouth and complements the filling beautifully.
To achieve that desired buttery texture, it’s essential to handle the dough with care. Overworking the dough can result in a tougher crust. It’s important to blend the fat and flour mixture until it resembles coarse crumbs, ensuring that small pockets of fat are dispersed throughout. This will create steam during baking, which leads to the flakiness we all crave in a great pie crust.
Keeping all your ingredients chilled also plays a vital role in obtaining a buttery texture. Cold fats, such as butter or shortening, should be cut into small cubes and chilled before mixing. The liquid, whether it’s water or milk, should be ice-cold. These measures prevent the fat from melting prematurely and ensure that it incorporates into the flour evenly.
Preparing the Pie Crust Dough
Now that you understand the importance of a buttery texture, let’s dive into the process of preparing the pie crust dough. This process involves gathering the ingredients, measuring and mixing the dry ingredients, adding the cold fat, blending the fat and flour mixture, incorporating the liquid, and forming a dough ball.
Gathering the Ingredients
Before you start making the crust, gather all the ingredients you’ll need. For a basic butter crust, you’ll typically need all-purpose flour, salt, cold unsalted butter, and ice water. Make sure your butter is cold and cut it into small cubes. Measure the other ingredients accurately to ensure the right balance in your dough.
Measuring and Mixing the Dry Ingredients
In a large mixing bowl, combine the all-purpose flour and salt. Whisk them together to ensure even distribution of the salt throughout the flour. Whisking also helps to aerate the mixture, resulting in a lighter crust.
Adding the Cold Fat
Once the dry ingredients are mixed, it’s time to add the cold fat. You can use unsalted butter, vegetable shortening, or even a combination of the two. The cold fat should be cut into small cubes and added to the bowl with the dry ingredients.
Blending the Fat and Flour Mixture
Using a pastry cutter or your fingertips, blend the cold fat and flour mixture together until it resembles coarse crumbs. The fat should be evenly distributed throughout the flour, creating small pockets that will contribute to a flaky texture.
Incorporating the Liquid
After blending the fat and flour, it’s time to incorporate the liquid. This usually involves adding ice water to the dough gradually. Start with a small amount, about one tablespoon at a time, and use a fork or your fingers to mix it into the dough. Continue adding water until the dough comes together and forms a ball.
Forming a Dough Ball
Once the dough has come together, gather it into a ball and gently knead it a few times to ensure that it’s fully combined. Be cautious not to overwork the dough, as this can result in a tough crust.
Dividing and Chilling the Dough
To make a lattice pie crust, you’ll need to divide the dough into two portions: one for the bottom crust and another for the lattice strips. This step ensures that you have enough dough for both parts of the crust and helps with the rolling process.
Dividing the Dough into Two Portions
After forming the dough ball, divide it into two portions. Usually, you’ll want about two-thirds of the dough for the bottom crust and one-third for the lattice strips. Use a knife or a bench scraper to cut the dough evenly. Shape each portion into a flat disk.
Flattening and Wrapping Each Portion
Once divided, flatten each portion with the palm of your hand. The disks should be about half an inch thick. This thickness allows for easier rolling and ensures that the crust will bake evenly. Wrap each portion tightly in plastic wrap to prevent drying and place them in the refrigerator to chill.
Refrigerating the Dough
Chilling the dough is crucial for achieving a tender and flaky crust. The cold temperature prevents the fat from melting prematurely and helps relax the gluten in the flour, resulting in a more tender dough. Let the dough chill in the refrigerator for at least one hour, or even overnight if you are preparing in advance.
Rolling Out the Dough
Now that your dough has chilled, it’s time to roll it out into a thin, even layer. Rolling out the dough involves preparing the rolling surface, dusting it with flour, rolling the bottom crust, and trimming the edges.
Preparing the Rolling Surface
Before rolling out your dough, ensure that the surface is clean and lightly floured. This prevents the dough from sticking and ensures a smooth rolling process. A large wooden or silicone rolling pin is recommended for easy rolling.
Dusting the Surface with Flour
Sprinkle a light dusting of flour over your rolling surface and the top of the chilled dough. Too much flour can toughen the crust, so be conservative when dusting. Spread the flour evenly to avoid any uneven thickness when rolling.
Rolling the Bottom Crust
Start with the larger portion of the dough, which will be used for the bottom crust. Place the dough in the center of the rolling surface and begin rolling it out with gentle, even pressure. Start from the center and roll outward, rotating the dough a quarter turn after each roll. This ensures an even thickness and prevents the dough from sticking.
Trimming the Edges
Once the dough is rolled out to the desired size, typically about 2 inches larger than your pie plate, use a sharp knife or a pastry wheel to trim off any excess edges. This creates a clean and even edge for your pie crust.
Creating the Lattice Strips
The lattice strips are what give a lattice pie crust its distinctive look. To create the strips, follow these steps: cutting long, thin strips of dough, using a pastry wheel or knife, ensuring consistent width and length, and keeping the dough strips chilled.
Cutting Long, Thin Strips of Dough
Take the smaller portion of the chilled dough and roll it out into a rectangle of even thickness. Using either a sharp knife or a pastry wheel, cut the dough into long, thin strips. The width of the strips should be consistent to achieve a visually pleasing lattice pattern.
Using a Pastry Wheel or Knife
When cutting the strips, you have the option to use either a pastry wheel or a knife. A pastry wheel creates a decorative scalloped or fluted edge on the strips, adding a touch of elegance to the lattice design. Alternatively, a knife can be used to create straight, clean edges for a simpler look.
Ensuring Consistent Width and Length
To achieve a visually appealing lattice pattern, it’s essential to ensure that the strips are of consistent width and length. This will result in an evenly spaced lattice and a professional-looking crust. Using a ruler or a dough cutter can help maintain consistency in your strips.
Keeping the Dough Strips Chilled
As you are cutting the strips, it’s important to keep them chilled to prevent the dough from becoming too warm and difficult to work with. If necessary, return the strips to the refrigerator intermittently while you construct the lattice.
Forming the Lattice Pattern
Now comes the fun part of creating the lattice pattern on your pie crust. This involves placing the longest strips vertically, weaving the horizontal strips over and under, alternating the over and under pattern, and smoothing the ends and edges.
Placing the Longest Strips Vertically
Start by placing the longest strips of dough vertically across the pie filling. Space them evenly, leaving a small gap between each strip. These vertical strips serve as the foundation for creating the lattice pattern.
Weaving the Horizontal Strips
Take the remaining dough strips and weave them horizontally through the vertical strips. Start by folding back every other vertical strip, then lay one horizontal strip across the remaining vertical strips. Unfold the folded back strips over the horizontal strip and repeat the process, alternating which vertical strips are folded back.
Alternating the Over and Under Pattern
Continue weaving the horizontal strips, always alternating between placing them over and under the vertical strips. This over and under pattern gives a classic lattice appearance to the pie crust. You can adjust the tension of the strips to create a tighter or looser lattice, depending on your preference.
Smoothing the Ends and Edges
Once all the strips are woven, gently press down the ends to secure them to the bottom crust and make sure they are all securely in place. Trim any excess dough from the edges and use your fingers or a fork to seal the lattice strips to the bottom crust. This will ensure that the lattice doesn’t come apart during baking.
Finishing the Pie Crust
After creating the lattice pattern, it’s important to give your pie crust a polished finish. This involves trimming and sealing the lattice strips, crimping the edges, brushing them with egg wash or milk, and sprinkling sugar for a golden finish.
Trimming and Sealing the Lattice Strips
Using a sharp knife or a pastry wheel, trim off any excess dough hanging over the edges of the pie plate. This creates a neat and uniform appearance. After trimming, seal the edges of the lattice strips to the bottom crust by pressing them together gently.
Crimping the Edges
Crimping the edges of your pie crust adds a decorative touch and helps seal the edges. There are several crimping techniques to choose from, including using a fork, pinching with your fingers, or creating a rope-like edge. Choose the method that you find most visually appealing and use it to crimp the edges all around the pie.
Brushing with Egg Wash or Milk
Before baking your pie, brush the lattice strips and the edges with either an egg wash or milk. This step adds shine and helps achieve a golden crust when baked. Be sure to cover the edges with foil or a pie shield to prevent excessive browning while the filling cooks.
Sprinkling with Sugar for a Golden Finish
For an extra touch of sweetness and crunch, sprinkle a bit of sugar over the lattice strips. This adds a beautiful golden finish to the crust and enhances both its appearance and taste.
Baking the Lattice Pie Crust
Now that you’ve completed all the preparation steps, it’s time to bake your lattice pie crust to perfection. This involves preheating the oven, positioning the pie in the center, monitoring the crust’s baking time, and using a pie shield to prevent excessive browning.
Preheating the Oven
Before placing your pie in the oven, preheat it to the recommended temperature stated in your recipe. This ensures that the crust bakes evenly, and the filling reaches the desired consistency.
Positioning the Pie in the Center
To allow for even heat distribution, position your pie on the center rack of the oven. This ensures that the entire pie, including the lattice crust, cooks uniformly, preventing any uneven browning or undercooked portions.
Monitoring the Crust’s Baking Time
The baking time for a lattice pie crust can vary depending on your recipe and the filling you are using. Keep a close eye on the crust as it bakes, and follow the guideline provided in your recipe. The lattice strips should turn a golden brown color, and the crust should feel firm to the touch when it’s ready.
Using a Pie Shield to Prevent Excessive Browning
To prevent the lattice strips from becoming overly browned or burnt, it’s a good idea to use a pie shield. A pie shield is a fitted aluminum foil ring that covers the edges of the pie, leaving the lattice exposed. This shield acts as a barrier, protecting the sensitive crust from excessive heat and ensuring that it bakes evenly.
Serving and Storage Tips
Your beautifully baked lattice pie is ready to be enjoyed, but first, there are a few tips to keep in mind regarding serving and storing the pie crust.
Allowing the Pie to Cool
Before slicing into your pie, it’s essential to allow it to cool completely. This allows the filling to set and makes for easier slicing and serving. Resting the pie for at least 2 hours at room temperature is recommended, but if possible, refrigerating it overnight will yield the best results.
Slicing and Serving
Once the pie is cooled, use a sharp knife or a pie server to slice and serve. The lattice pattern will make for an eye-catching presentation, with each slice showcasing the beautiful interweaving of the strips. Serve your pie with a dollop of whipped cream, a scoop of ice cream, or as is, and enjoy the fruits of your labor!
Storing Leftover Pie Crust
If you have any leftover pie crust or lattice strips, don’t let them go to waste. Wrap them tightly in plastic wrap or place them in an airtight container and store them in the refrigerator. These leftovers can be used to make mini pies, tarts, or even as a topping for a fruit crisp.
Reheating the Pie
If you have leftovers and want to enjoy a warm slice of pie, you can easily reheat it. Preheat your oven to a low temperature, around 275°F (135°C), and place the desired amount of pie slices on a baking sheet. Cover the slices with aluminum foil and warm them in the oven for about 10-15 minutes, or until heated through. This will ensure that the crust stays crisp and the filling is heated evenly.
Experimenting with Lattice Variations
Creating a lattice pie crust opens up a world of possibilities for experimentation and creativity. While the classic lattice pattern is elegant and timeless, you can try different variations and techniques to give your pie a unique twist.
Creating a Diagonal Lattice
Instead of weaving the horizontal strips perpendicular to the vertical strips, experiment with a diagonal lattice pattern. This creates a striking visual effect and can be achieved by placing the strips at a 45-degree angle to the edges of the pie.
Adding Decorative Cut-Outs
To take your lattice design to the next level, consider adding decorative cut-outs to the strips. Use small cookie cutters or a sharp knife to create shapes such as hearts, stars, or leaves. These cut-outs add a whimsical touch to your pie crust and allow the filling to peek through, creating a visually appealing contrast.
Using Different Dough Colors
For a truly eye-catching lattice pie crust, you can play with different colors of dough. Divide your dough into separate portions and tint each one with food coloring or natural dyes like beetroot powder or matcha powder. Roll out each colored dough and cut it into strips, then create a lattice pattern with the strips of different colors. The result is a visually stunning pie crust that will impress your guests.
Mixing Different Dough Flavors
Instead of using a plain dough for your lattice strips, why not mix different flavors into the dough? Add cocoa powder for a chocolatey twist, or spices like cinnamon or allspice for a warm and fragrant crust. Experimenting with different flavors can elevate the overall taste of your pie and add an unexpected element to your lattice design.
In conclusion, creating a lattice pie crust is a rewarding endeavor that can elevate your homemade pies to new levels of artistry and deliciousness. By following the steps outlined in this article, you’ll be well on your way to achieving a beautifully crafted lattice crust that will impress your family and friends. So, grab your rolling pin, gather your ingredients, and let your creativity shine through as you embark on this pie-making adventure. Happy baking!
